

2024.04.10 - [◽️ Programming/T I L] - WishList 만들기 (1) - (URLSession 데이터 연결 완료)
오늘은 드디어 며칠동안 끙끙 앓던 코어데이터를 연결하는데 성공했다. 물론 모든걸 다 이해하고 연결한건 아니지만 그래도 결과를 냈다는거에 만족하고 이전에 만들었던 TodoList에도 코어데이터를 적용해보고 더 익숙해지는 과정이 있어야 할 것 같다.
AppDelegate 코드 구성하기
lazy var persistentContainer: NSPersistentContainer = {
   let container = NSPersistentContainer(name: "WishList")
    container.loadPersistentStores(completionHandler: { (storeDescription, error) in
        if let error = error as NSError? {


            fatalError("Unresolved error \\(error), \\(error.userInfo)")
        }
    })
    return container
}()

func saveContext () {
    let context = persistentContainer.viewContext
    if context.hasChanges {
        do {
            try context.save()
        } catch {
            let nserror = error as NSError
            fatalError("Unresolved error \\(nserror), \\(nserror.userInfo)")
        }
    }
}
AppDelegate 내 내가 설정해 둔 코어데이터의 이름을 잘 넣어주어야 연결이 된다.
CoreData 저장 함수 구현하기
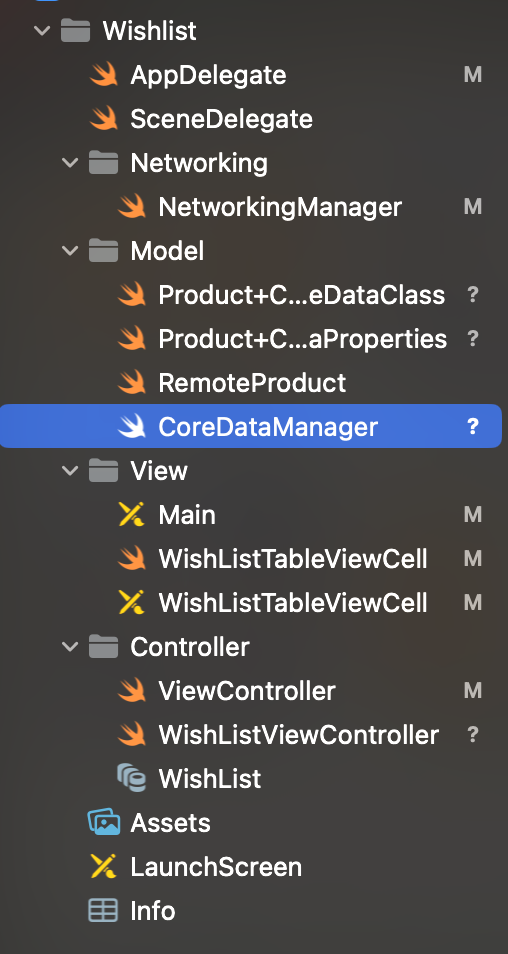
코어데이터의 설정은 따로 CoreDataManager을 따로 생성하여 함수를 정리할 수 있도록 구성했다.
먼저 CoreData 의 함수를 모아두는 CoreDataManager 를 싱글톤 방식을 통해 쉽게 데이터에 접근 할 수 있도록 구성하고 AppDelegate 를 타입케스팅해 연결해주었다.
static let shared = CoreDataManager()
private init() {}

let appDelegate = UIApplication.shared.delegate as? AppDelegate
lazy var context = appDelegate?.persistentContainer.viewContext

let coreDataName: String = "Product"
그 이후 코어데이터에 값을 저장할 수 있는 함수를 만들어 주었다.
func saveWishListData(_ product: RemoteProduct, completion: @escaping () -> Void) {
    guard let context = context else {
        print("context를 가져올 수 없습니다.")
        return
    }

    if let entity = NSEntityDescription.entity(forEntityName: coreDataName, in: context) {
        let newProduct = NSManagedObject(entity: entity, insertInto: context)
        newProduct.setValue(product.id, forKey: "id")
        newProduct.setValue(product.title, forKey: "title")
        newProduct.setValue(product.price, forKey: "price")

        do {
            try context.save()
            print("코어데이터에 저장되었습니다.")
            completion()
        } catch {
            print("코어데이터에 저장하는데 실패했습니다.", error)
            completion()
        }
    }
}
코어 데이터 내 id , title , price의 값을 저장하기 위해 클로저를 사용해서 구성했다.
entity을 연결해 context 안에 값을 넣어주고 값이 들어와서 변경이 있을 경우 해당 context 를 save 할 수 있도록 코드를 구성했다.
CoreData 값 가져오는 함수 구현
func getWishListFromCoreData() -> [Product] {
    var wishList: [Product] = []

    if let context = context {
        let request = NSFetchRequest<NSManagedObject>(entityName: self.coreDataName)
        let idOrder = NSSortDescriptor(key: "id", ascending: false)
        request.sortDescriptors = [idOrder]

        do {
            if let fetchWishList = try context.fetch(request) as? [Product] {
                wishList = fetchWishList
            }
        } catch {
            print("가져오기 실패")
        }
    }

    return wishList
}
이후 secondVC의 테이블 뷰 내 저장된 값을 보여주기 위해 저장된 코어데이터를 내보낼 수 있는 함수를 구현해 주었다.
그 이후 VC 로 넘어와 코어데이터매니저의 값을 변수에 넣고
var currentProduct: RemoteProduct?
let networkingManager = NetworkingManager()
let wishListManager = CoreDataManager.shared
위시리스트 담기 버튼을 누르면 해당 데이터를 저장하도록 구현해 둔 함수를 가져와 실행할 수 있도록 구성한다.
@IBAction func saveProductButtonTapped(_ sender: UIButton) {
    guard let product = currentProduct else {
        print("제품 정보가 없습니다.")
        return
    }

    wishListManager.saveWishListData(product) {
        print("제품이 저장되었습니다.")
    }
}
그렇다면 코어데이터에 저장이 완료 된다 🙂
이 과정까지 너무 어려워 참 머리가 아프다 아직도 어려운 것 같다.
상품 랜덤 돌리기 기능 구현
그 다음 다음 상품을 확인하는 버튼을 누르면 랜덤으로 상품이 선택되도록 이전에 URLSession 을 통해 데이터를 랜덤으로 가져왔던 함수를 다시 한번 호출해 사용하는 것으로 기능을 구현하였다.
@IBAction func nextProductButtonTapped(_ sender: UIButton) {
    self.fetchData()
}
이렇게 오늘은 랜덤으로 상품이 나올 수 있도록 구현하고 다음 상품을 누르면 랜덤으로 상품으로 변동되며,
현재 떠있는 상품을 담는다면 그 해당하는 데이터를 코어데이터에 담는 과정까지 진행했다.
다음엔 secondVC 에 넘어가 테이블뷰를 구성하고 그 테이블 뷰 셀에 코어데이터에 저장된 값을 넣을 수 있도록 구현 한 뒤 원하는 데이터를 삭제할 수 있는 기능까지 구현할 예정이다.
오늘도 빠이팅..
'◽️ Programming > T I L' 카테고리의 다른 글
| Alamofire 활용하여 내 Github 만들기 (1) (2) | 2024.04.17 |
|---|---|
| WishList 만들기 (완) - 코어데이터 삭제 , 리프레쉬 기능 구현 (0) | 2024.04.14 |
| WishList 만들기 (1) - (URLSession 데이터 연결 완료) (0) | 2024.04.10 |
| Core Data 뿌시기 (0) | 2024.04.09 |
| [ProJect 일지] 키오스크 (4) (1) | 2024.04.05 |