2024.05.31 - [◽️ Programming/T I L] - [Project 일지] 여행 기록 앱 만들기 (2) - MapKit , CustomFlowLayout
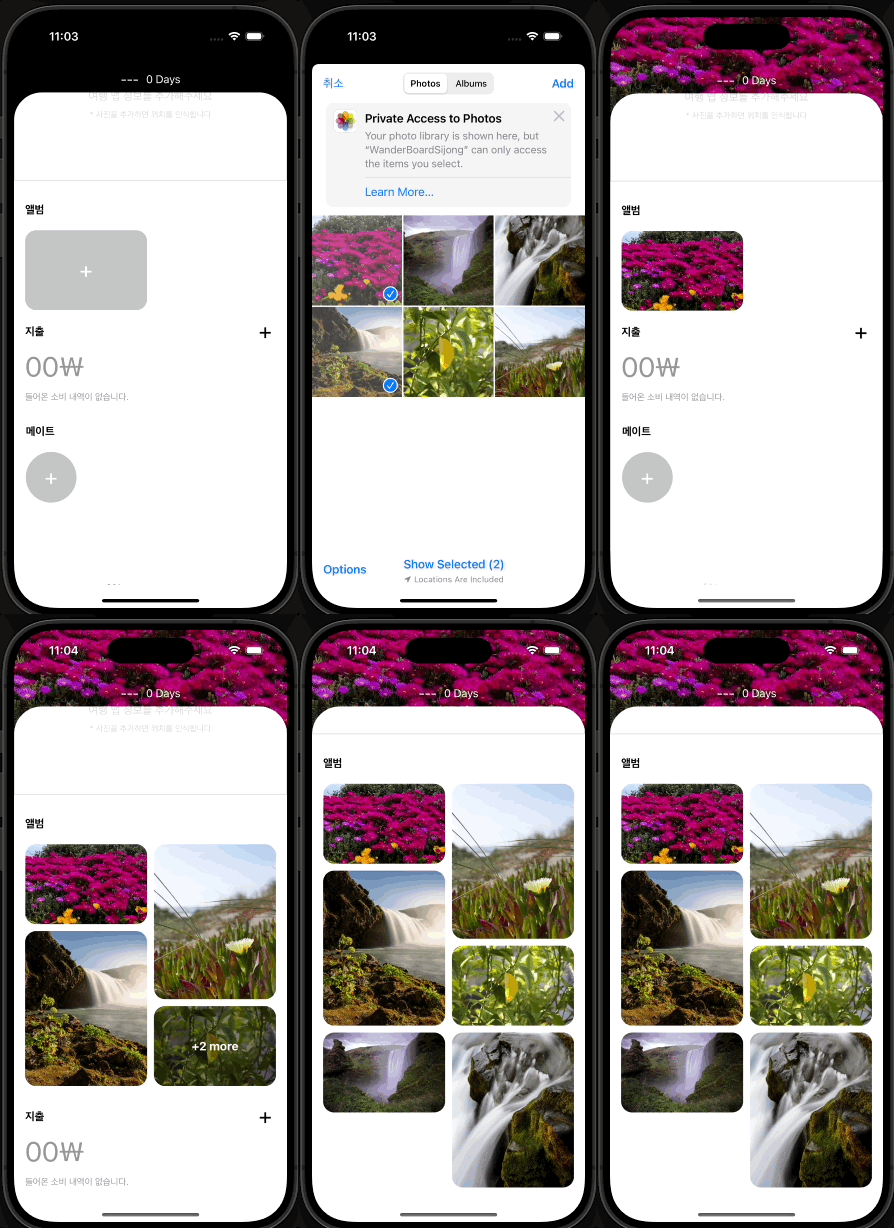
오늘은 컬렉션 뷰에 4개 이상의 사진이 들어갈 경우, 4번째 사진에 몇장이 더 추가되어있는지 표시하고 해당 셀을 클릭하면 셀이 확장될 수 있도록 구현하였다.
CollectionView Cell 확장하기
var isExpanded: Bool = false
먼저 isExpanded의 값을 인스턴스화 해서 값을 설정해 특정 상황에서 해당 내용을 선언할 수 있도록 해준다.
그 다음 갤러리 컬렉션 뷰 셀을 담당하는 VC로 이동해 몇개의 사진이 더 있는지 표시 해줄 디밍 뷰와 카운트를 설정해준다.
let overlayView = UIView()
let moreLabel = UILabel()
overlayView.backgroundColor = UIColor.black.withAlphaComponent(0.5)
overlayView.clipsToBounds = true
overlayView.layer.cornerRadius = 16
overlayView.isHidden = true
overlayView.snp.makeConstraints {
    $0.edges.equalToSuperview()
}

moreLabel.textColor = .white
moreLabel.font = UIFont.systemFont(ofSize: 17, weight: .bold)
moreLabel.textAlignment = .center
moreLabel.snp.makeConstraints {
    $0.center.equalToSuperview()
}
일단 isHidden을 사용해 숨겨준 뒤 특정 상황에서 나올 수 있도록 설정한다.
다시 디테일 VC로 넘어와서 indexPath.row가 3일때 이미지의 갯수가 4개보다 많고 isExpanded값이 false일 경우 디밍뷰 내 카운트 레이블에 특정 갯수를 표현할 수 있도록 설정한다.
func collectionView(_ collectionView: UICollectionView, cellForItemAt indexPath: IndexPath) -> UICollectionViewCell {
  if collectionView == galleryCollectionView {
      guard let cell = collectionView.dequeueReusableCell(withReuseIdentifier: GalleryCollectionViewCell.identifier, for: indexPath) as? GalleryCollectionViewCell else { fatalError("컬렉션 뷰 오류") }
      if selectedImages.isEmpty {
          cell.configure(with: nil)
      } else {
          if indexPath.row < 3 {
              cell.configure(with: selectedImages[indexPath.row])
          } else if indexPath.row == 3 {
              if selectedImages.count > 4 && !isExpanded {
                  cell.configure(with: selectedImages[indexPath.row], moreCount: selectedImages.count - 4)
              } else {
                  cell.configure(with: selectedImages[indexPath.row])
              }
          } else {
              cell.configure(with: selectedImages[indexPath.row])
          }
      }
      return cell
그런 다음 didSelectItemAt 부분에 해당 셀을 클릭하면 selectedImage에 있는 이미지가 모두 보이고 컬렉션 뷰를 리로드 하는 식을 구현하면
func collectionView(_ collectionView: UICollectionView, didSelectItemAt indexPath: IndexPath) {
    if collectionView == galleryCollectionView {
        if selectedImages.isEmpty || indexPath.row == 3 {
            if selectedImages.count > 4 && !isExpanded {
                isExpanded = true
                collectionView.reloadData()
                updateCollectionViewHeight()
            } else {
                var configuration = PHPickerConfiguration()
                configuration.selectionLimit = 0
                configuration.filter = .images
                let picker = PHPickerViewController(configuration: configuration)
                picker.delegate = self
                present(picker, animated: true, completion: nil)
            }
        }
    }
}
이렇게 컬렉션 뷰를 확장하는 기능 구현이 완료 된다 🙂

배경이미지 위에 버튼 클릭 하기
배경 이미지 위에 addSubView한 버튼을 클릭하니 인식이 되지 않고 버튼 자체가 클릭이 되지 않았다.. 왜 그런지 많은 검색을 통해 찾아본 결과 해당 내용이 배경 이미지 위에 위치하고 있어 addTargat이 제대로 먹히지 않고 있다는 점을 발견하게 되었다.
이점을 해결하려면 아주 간단하게 해결할 수 있다.
let backgroundImageView = UIImageView().then {
    $0.contentMode = .scaleAspectFill
    $0.clipsToBounds = true
    $0.backgroundColor = .black
    $0.isUserInteractionEnabled = true
}
isUserInteractionEnabled = true 떠있는 배경화면 내 해당 내용을 true로 설정하면 바로 구현이 가능하다..
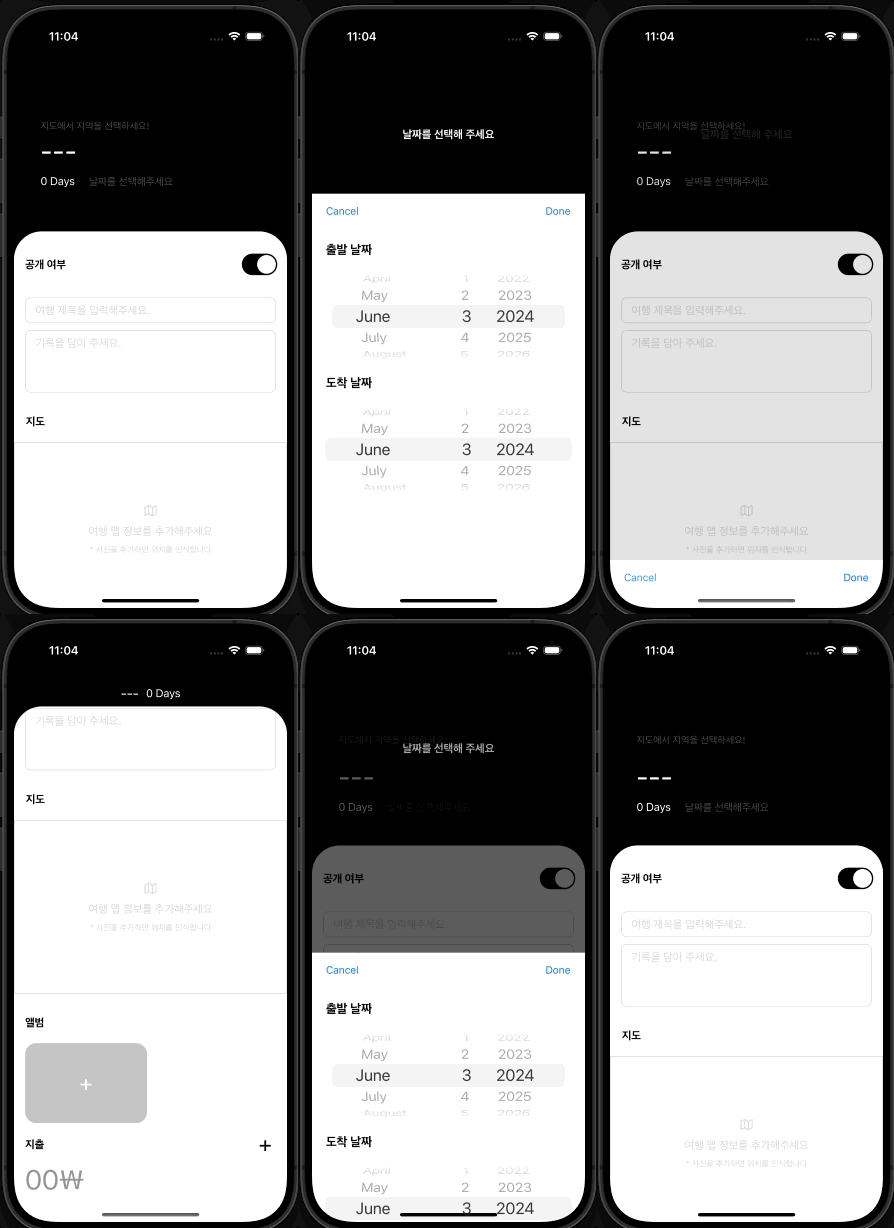
이렇게 해서 눌러진 버튼은 커스텀 모달 뷰를 활용해 화면을 불러오는데 사용되었다..

오늘은 여기까지..
'◽️ Programming > T I L' 카테고리의 다른 글
| [Project 일지] 여행 기록 앱 만들기 (5) - sendSubviewToBack , 비동기 처리 (1) | 2024.06.07 |
|---|---|
| [Project 일지] 여행 기록 앱 만들기 (4) - scrollViewDidScroll, SegmentControl (1) | 2024.06.05 |
| [Project 일지] 여행 기록 앱 만들기 (2) - MapKit , CustomFlowLayout (0) | 2024.05.31 |
| [Project 일지] 여행 기록 앱 만들기 (1) - ScrollView , CollectionCustomView (3) | 2024.05.29 |
| [Project 일지] 단어장 앱 만들기 (6) (0) | 2024.05.20 |

